How to Create Custom Promoted Link Tiles in SharePoint?
What is a promoted link in SharePoint?
Promoted links list is one of the new list types (App) introduced out of the box in SharePoint 2013, and It’s actually a list with a special view that shows the list items as tiles. Here is an example of a SharePoint 2013 team site with promoted links Metro UI.
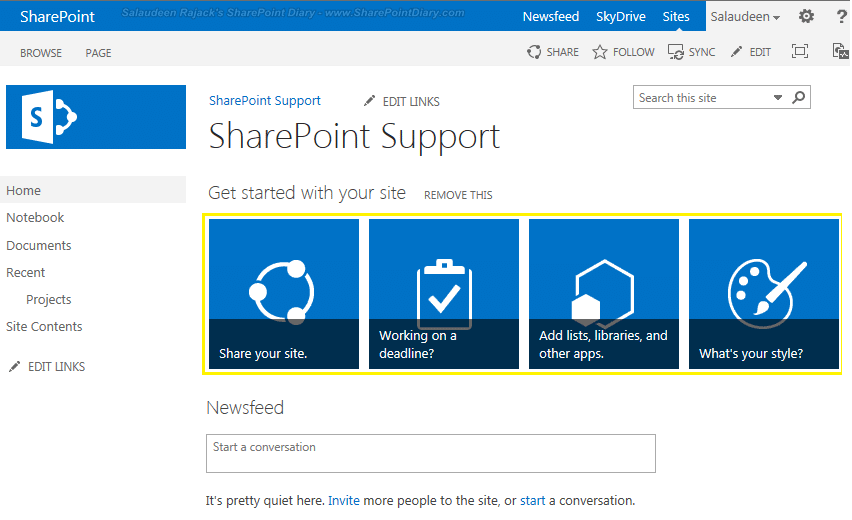
Obviously, We can create our own Tiles like the one in “Get Started with your site”, which is shown on all new team sites in SharePoint 2016. Let’s create Promoted Links as a Quick Navigation on a SharePoint support site’s Home Page.

Step 1: Create New Promoted Links List
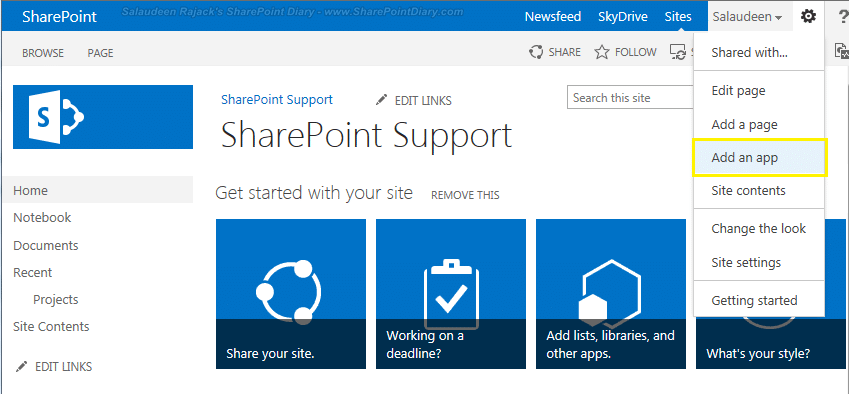
- To begin creating a Promoted Links list, Click on Site Settings Gear >> Choose “Add an app” link
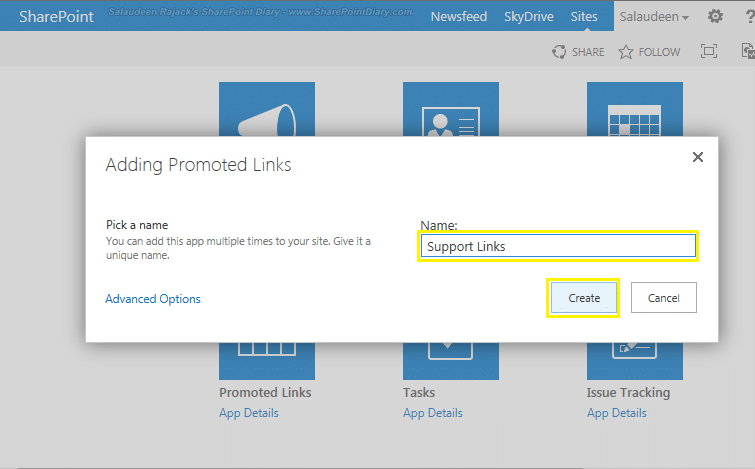
- Click on “Promoted Links” App list type

- You will be prompted for a list name. In my case, Its “Support Links
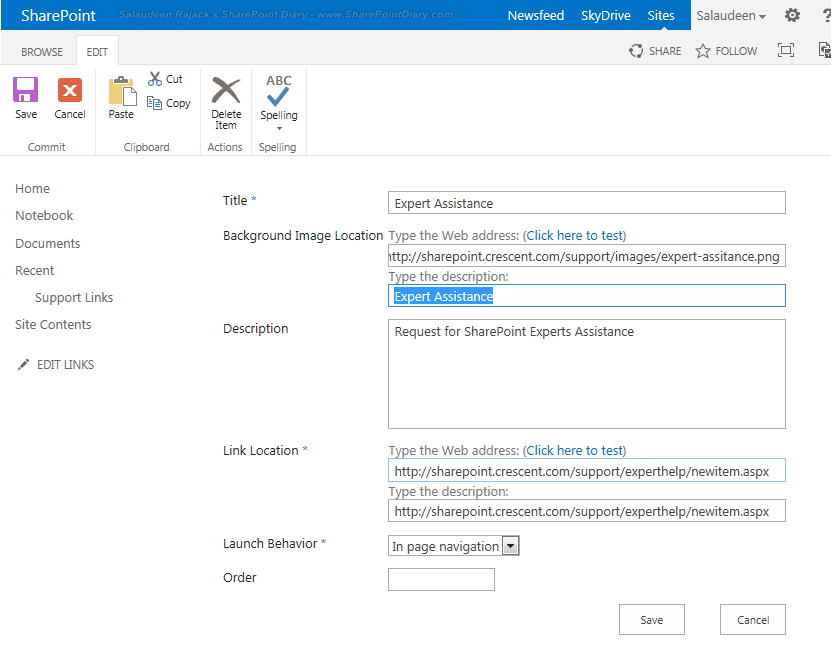
- Once you have created the Promoted Links, You can add links to the list by providing values such as: Link title, Description, Background Image Location(complete path of any existing image store anywhere – The tiles are 150px by 150px), Image Tooltip, Link behavior (Open link in a separate window), Order (The lowest number will be the first tile). In my case, I’ve added links such as “Add New Site”, “Request for Expert Help”, etc.
Step 2: Add the Promoted Links List App to the Home page
Once you have added all the required link items, you have to add this App to the page wherever needed (typically on the Home page!). You can remove the above tile using the “Remove this” link and create your own tiles.
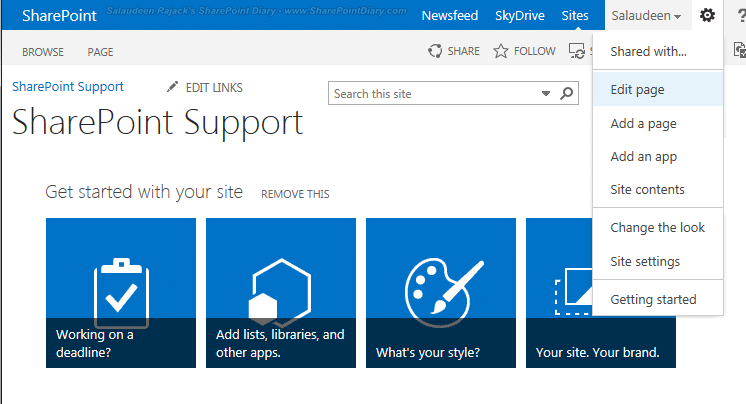
- Navigate to the page where you where you want to add your tiles. Click on “Edit page”
- Click on Insert tab >> App Part

- Select the promoted links list (in my case its “Support Links”) and click on add button to add it to the page.

- Save the page once done.
This is how my tiles view looks like:
Pretty good post. I just stumbled upon your blog and wanted to say that I have really enjoyed reading your blog posts.
If some one needs expert view on the topic of running a blog then i advise
him/her to pay a visit this web site, Keep up the pleasant work.
Thanks for Article!
I have one another challenge I would like to show only those promoted link of document library for what user having access to.. Can you please help me for this solution?
Regards
Piyush Patel
https://piyushmvp.com
Hi,
Great write up – thanks. I have got the promoted link showing up and it links to the correct page but the image is missing. I have tried png, jpg’s, resized to 150×150 and saved them in documents and site assets but nothing seems to work. Any Suggestions ?
Can you help with