Get All Files from a Folder using PowerShell
As IT professionals, managing files and folders is an inevitable part of our daily responsibilities. From system-generated log files to user-created spreadsheets and documents, the number of files we handle often reaches into the tens, if not hundreds of thousands. Locating specific files quickly then becomes critical for tasks like troubleshooting, reporting, retention, and more. Yet traversing folder structures manually to find target files can be incredibly tedious and time-consuming.
Luckily, with PowerShell, we have a robust command line interface toolset built for automating system administration tasks, including advanced file management operations. Using native PowerShell cmdlets like Get-ChildItem combined with pipeline passing and text manipulation, we can query folder contents with precision and ease.
In this comprehensive guide, I will demonstrate step-by-step how to leverage PowerShell to efficiently retrieve all files stored in a folder structure. We will cover the basics of PowerShell, the ‘Get-ChildItem’ cmdlet, and various methods for retrieving files from a folder.
Table of contents
- Introduction to PowerShell File Management
- Why to get a List of Files?
- Understanding the ‘Get-ChildItem’ cmdlet in PowerShell
- How to Get All Files in a Folder using PowerShell?
- Filtering Files in PowerShell
- Export Files List to a File
- Looping Through Files in a Folder with PowerShell
- Using PowerShell to search for files in a folder
- Common errors and how to troubleshoot them
- Alternative methods for getting all files from a folder
- Conclusion
Introduction to PowerShell File Management
In managing a Windows operating system, PowerShell emerges as a potent tool, offering an extensive range of capabilities for automating tasks and managing files. One common task that we often need to perform is retrieving a listing of files from a specific folder. When it comes to file management, PowerShell provides a set of cmdlets that allow you to create, delete, copy, move, and modify files and folders. These cmdlets provide a flexible and efficient way to manage files and folders from the command line.
Why to get a List of Files?
You may need to get a list of files in a particular folder using PowerShell for many reasons. Here are some common examples:
- Collect logs or reports – By grabbing all files, such as .log or .csv files, in a logs or reports directory, you can compile the data for analysis.
- Backup files – Getting a list of files allows you to then copy or move them to another location for backup purposes.
- Process files – Retrieve files from a folder in order to process them in some way, like loading them into a database.
- File management – You may want to get all files to organize them better, delete old ones, check for duplicates, etc.
Knowing how to properly get all files from any target folder is an invaluable skill for any PowerShell user or admin.
Understanding the ‘Get-ChildItem’ cmdlet in PowerShell
The ‘Get-ChildItem’ cmdlet is a PowerShell cmdlet that retrieves all child items (files and folders) in a specified location. It is one of the most commonly used cmdlets in PowerShell and is used to navigate the file system, retrieve files, and get information about files and folders.
The ‘Get-ChildItem’ cmdlet or its alias DIR/LS has several parameters that allow you to specify the location of the items to retrieve, the type of items to retrieve, and how to display the items. For example, you can use the ‘-Path’ parameter to specify the folder to retrieve items from, and the ‘-Recurse’ parameter to retrieve items from all subfolders. This cmdlet supports the -Filter, -Include, and -Exclude parameters. The basic syntax is:
Get-ChildItem
[-Path] <String[]>
[[-Filter] <String>]
[-Include <String[]>]
[-Exclude <String[]>]
[-Recurse] [<CommonParameters>]
To list files and folders in a specific directory, simply provide the path as an argument to the Get-ChildItem cmdlet. You can also use wildcards to filter the results based on specific file names or extensions. In addition, Get-ChildItem offers various parameters that allow you to further refine your search criteria, such as specifying the maximum depth or excluding hidden items. This cmdlet can help to work with various PowerShell providers and specified locations, such as a file system directory, registry hive, or certificate store.
This command not only lists files and directories at a specified location but also allows for filtering and recursive searches across subdirectories. We can further refine our file search by employing various parameters and options available within PowerShell to pinpoint precisely the files we need.
How to Get All Files in a Folder using PowerShell?
To get all files in a folder using PowerShell, you can use the ‘Get-ChildItem’ cmdlet with the ‘-File’ parameter. This parameter specifies that you want to retrieve only files, not folders.
Here is an example of how to use the ‘Get-ChildItem’ cmdlet to retrieve all files in a folder:
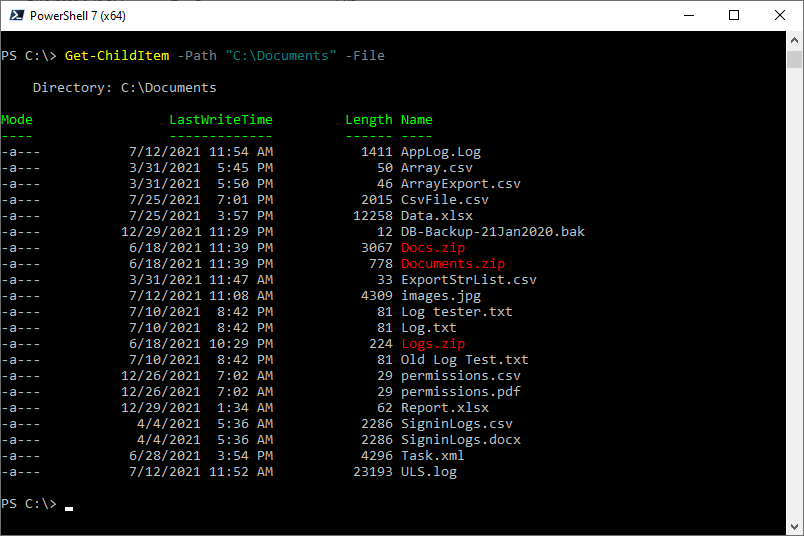
Get-ChildItem -Path "C:\Documents" -File
This command uses the Path parameter to retrieve all files in the ‘C:\Documents’ folder. In the result window, You will see a list of all files in the folder, including the file name, directory, and size.
You can also use the -Recurse parameter to search for files in subfolders of the specified folder. For example:
$AllFiles = Get-ChildItem C:\Documents -File -Recurse
This will get all files of C:\Documents as well as, in all child containers.
Filtering Files in PowerShell
When working with PowerShell, the Get-ChildItem cmdlet is a powerful tool for retrieving files and folders within a specified directory. However, you might often find yourself needing to filter the items retrieved from a folder based on specific criteria. This is where the various parameters of Get-ChildItem come into play.
With Get-ChildItem, you can filter items based on their name, extensions, attributes, and other properties. For example, if you’re looking to retrieve all files with a specific extension, you can use the ‘-Filter’ parameter followed by the extension you’re interested in. This allows you to narrow down your search and retrieve only the files that meet your criteria.
Here is an example of how to use the -Filter parameter to specify a search pattern for the files you want to retrieve:
$TextFiles = Get-ChildItem C:\Docs -File -Filter "*.txt"
This will return only files with the .txt extension.
Filtering by Attributes
We can also filter our search based on file attributes such as ReadOnly, Hidden, System, Device, Temporary, and Directory.
Get-ChildItem -Path "C:\Documents" -Recurse -Attributes ReadOnly
To combine multiple attributes, we use commas to separate them.
Get-ChildItem -Path "C:\Documents" -Recurse -Attributes Hidden,System
By mastering these advanced file search techniques, we streamline our efforts in PowerShell, ensuring that file management is not just doable but efficient.
Including and Excluding Files
In addition to the ‘-Filter’ parameter, Get-ChildItem also provides other parameters, such as ‘-Include’ and ‘-Exclude’, which allow you to further refine your search. These parameters enable you to include or exclude specific files or folders from the results, as well as search for items in subdirectories. We may also refine our file retrieval by including or excluding specific files. The Include and Exclude parameters work in conjunction with Get-ChildItem to match or eliminate files that align with our specified patterns. Here’s how we can include text and document files:
In this example, we will use the Get-ChildItem cmdlet to get all files from the C:\Temp folder. We will use the -Include parameter to include only .txt files.
Get-ChildItem -Path "C:\Temp\*" -Include *.txt
It’s also possible to specify multiple file extensions:
Get-ChildItem -Path C:\Documents\* -Include *.txt, *.csv
To exclude files, we’d do the following:
Get-ChildItem -Path C:\Documents\* -Exclude *.log, *.csv
In this example, we will use the Get-ChildItem cmdlet to get all files from the C:\Temp folder. We will use the -Exclude parameter to exclude .txt files.
Get-ChildItem -Path "C:\Documents\*" -Exclude *.txt
Let’s include specific file types and exclude certain files with specific names:
Get-ChildItem -Path "C:\Documents\*" -Include *.txt -Exclude log*
This command uses an asterisk as a wildcard, indicating any text file regardless of the name, with -Exclude specifically filtering out the ones starting with ‘error’.
Using Wildcards
Wildcard characters increase our command’s flexibility, allowing us to match file names or extension patterns. The * and ? are the most common wildcards, representing any string and a single character, respectively.
Get-ChildItem -Path "C:\Documents\*.txt" -Recurse
Recursive Searches
When we need to locate files not just in a target directory, but throughout its subfolders, we use the -Recurse parameter with Get-ChildItem. By adding -Depth parameter followed by an integer, we define how many levels down we wish to search, giving us control over the search’s scope.
Get-ChildItem -Path "C:\Documents" -Recurse -Depth 2
With the -Force parameter, we can include items that are hidden files or marked as system files.
Get-ChildItem -Path "C:\Documents" -Recurse -Force
Select Properties
By default, the Get-ChildItem cmdlet returns Mode, LastWriteTime, Length, and Name properties. If you need to retrieve specific properties of files, you can use the “Select-Object” cmdlet in conjunction with the “Get-ChildItem” cmdlet. The “Select-Object” cmdlet allows you to retrieve only the properties you need, such as file sizes or created dates. You can use the following command to retrieve the name and size of all files in a folder:
Get-ChildItem -Path C:\Folder | Select-Object Name,Length
Sort Files
Sorting files by the time they were last written to, utilizes the LastWriteTime property. This command organizes files beginning with the most recently modified:
Get-ChildItem -File | Sort-Object -Property LastWriteTime -Descending
To sort files by size, we leverage the Length property of files. To reverse the order and view larger files first, simply add the -Descending flag:
Get-ChildItem -File | Sort-Object Length -Descending
Copy Files to Backup
Let’s copy only .docx files over 30 days old to a backup location:
$Limit = (Get-Date).AddDays(-30)
Get-ChildItem -File *.docx -Recurse | Where { $_.LastWriteTime -lt $Limit } | Copy-Item -Destination D:\Backups
This gets old files anywhere in the folder structure and copies them to another drive.
Export Files List to a File
Another useful feature of PowerShell is that it allows you to save the list of files to a text file. If you need to review the list of files later or share it with someone else, you can use the “Out-File” cmdlet to do this. Simply add “Out-File filename.txt” to the end of the command. The final command should look like this:
Get-ChildItem -Path C:\Documents| Out-File filenames.txt
This command will save the list of files to a text file named “filename.txt” in the directory where PowerShell is running.
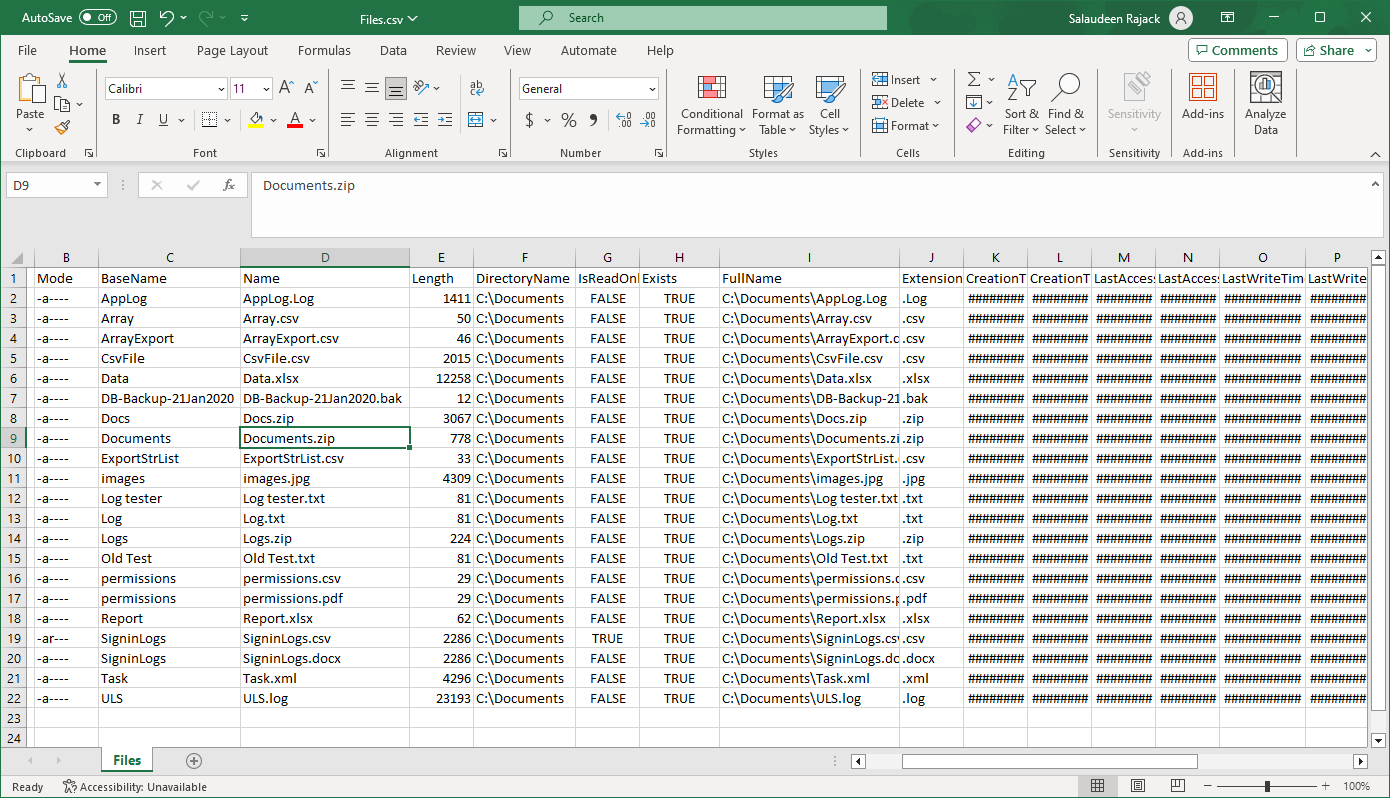
You can also export the results to a CSV file, using the “Export-Csv” cmdlet. For example, to export the results to a CSV file named “files.csv,” use:
Get-ChildItem -File | Export-Csv -Path Files.csv -NoTypeInformation
This command will create a CSV file in the current directory containing the file name, directory, and size of all files in the folder.
Looping Through Files in a Folder with PowerShell
When working with PowerShell, it is common to have scenarios where you need to perform actions on multiple files within a folder. PowerShell provides a simple and efficient way to accomplish this by utilizing a foreach loop. The foreach loop allows you to iterate through each file in a folder and perform specific actions on them, such as processing the file’s contents or modifying its properties.
Looping through Files in a Folder
To loop through files in a folder using PowerShell, you can use the Get-ChildItem cmdlet to retrieve all the files within the folder. You can then use a foreach loop to iterate through each file and perform the desired actions. Here’s an example:
$FolderPath = "C:\Documents"

#Get All files from a Folder's Root
$Files = Get-ChildItem -Path $FolderPath

#Iterate through Files
ForEach ($File in $Files) {
     # Perform actions on each file
     Write-Host "Processing file: $($File.Name)"
 }
In this example, we first specify the path to the folder using the $folderPath variable. We then use the Get-ChildItem cmdlet to retrieve all the files within the folder and store them in the $files variable. Finally, we use a foreach loop (or ForEach-Object) to iterate through each file in the $files variable and perform the desired actions. In this case, we are simply displaying the name of each file using the Write-Host cmdlet, but you can replace this with any actions you need to perform.
Moving Files by Extension
Let’s get specific types of files and move them: Moving files with a specific extension, like .txt, to a new destination, can be achieved with:
Get-ChildItem -Path "C:\Backup" -Recurse -Filter *.txt | Move-Item -Destination "D:\Archive"
Using PowerShell to search for files in a folder
PowerShell provides several ways to search for files in a folder. One of the most common methods is to use the ‘-Filter’ parameter with the ‘Get-ChildItem’ cmdlet. This parameter allows you to specify a filter for the items to retrieve.
For example, to search for all files that contain the word ‘example’ in the ‘C:\Folder’ folder, you would run the following command:
Get-ChildItem -Path 'C:\Documents' -Filter *log* -File
This command retrieves all files that contain the word ‘example’ in the ‘C:\Folder’ folder.
Common errors and how to troubleshoot them
When working with PowerShell, you may encounter some common errors. Here are a few of the most common errors and how to troubleshoot them:
- ‘Access Denied’ error: This error occurs when you don’t have permission to access a file or folder. To troubleshoot this error, make sure you have the appropriate permissions to access the file or folder.
- ‘File Not Found’ error: This error occurs when the file or folder you are trying to access doesn’t exist. To troubleshoot this error, make sure you have the correct path to the file or folder.
- ‘Invalid Argument’ error: This error occurs when you provide an invalid argument to a cmdlet. To troubleshoot this error, make sure you are providing valid arguments to the cmdlet.
Alternative methods for getting all files from a folder
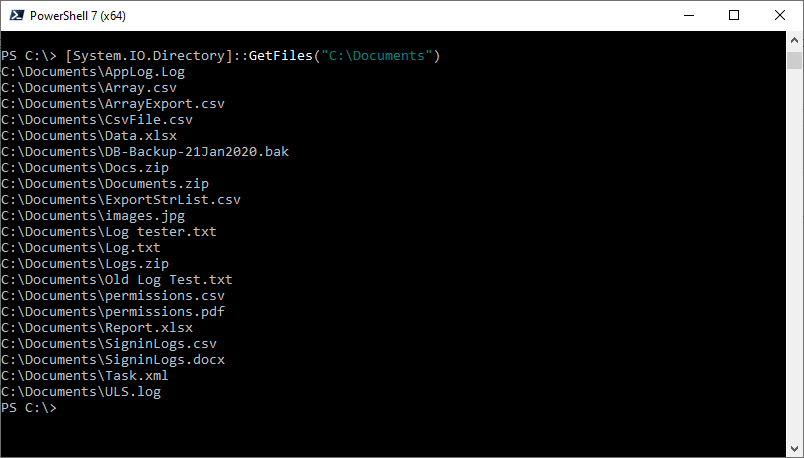
While the ‘Get-ChildItem’ cmdlet is the most common method for retrieving files from a folder in PowerShell, there are alternative methods you can use. One such method is to use the ‘.NET Framework’ classes. Here is an example of how to retrieve all files in a folder using the ‘.NET Framework’ classes:
$Files = [System.IO.Directory]::GetFiles("C:\Documents")
This command retrieves all files in the ‘C:\Documents’ folder using the ‘.NET Framework’ classes.
Microsoft References:
- https://learn.microsoft.com/en-us/powershell/scripting/samples/working-with-files-and-folders?view=powershell-7.4
- https://learn.microsoft.com/en-us/powershell/module/microsoft.powershell.management/get-childitem?view=powershell-7.3
Conclusion
As you’ve learned, PowerShell provides a comprehensive set of commands and features for efficient file management and folder manipulation; retrieving all files from a folder is just one of its many capabilities. With the help of the Get-ChildItem cmdlet and other related commands, we can easily retrieve files and folders within our PowerShell scripts.
In this article, we discussed how to use the Get-ChildItem cmdlet to list files and folders, as well as how to filter the items based on various parameters. With a few simple commands, you can retrieve specific types of files, retrieve file properties, and even save the list of files to a text file. Additionally, we learned how to loop through files in a folder using a foreach loop, allowing us to perform actions on each individual file.
By leveraging these powerful features, we can streamline and automate our file management tasks with precision and efficiency. Whether we need to organize, backup, or process files and folders, PowerShell provides the tools necessary to accomplish our goals effectively.
You can use the Get-ChildItem cmdlet to retrieve a list of all items within a specified folder, including files. This allows you to get files from a folder in PowerShell. For example, Get-ChildItem -Path C:\YourDirectory -File will return all the files in the specified directory without including subdirectories.
By using the Get-ChildItem cmdlet, you can list files and folders in a directory, including subfolders. Get-ChildItem C:\Documents
This provides a comprehensive view of the contents of a folder in PowerShell.
Yes, you can filter items retrieved from a folder using Get-ChildItem in PowerShell. You can filter items based on their name, extensions, attributes, and other properties to retrieve specific files or folders according to your requirements. For example, you can use the command Get-ChildItem -Filter *.txt"
To only retrieve items with a .txt extension.
You can use the Copy-Item cmdlet in PowerShell to copy files and folders from one location to another. Simply specify the source and destination paths to perform the copy operation and efficiently manage and duplicate files and folders within your PowerShell scripts.Copy-Item -Path "C:\path\to\source.txt" -Destination "C:\path\to\destination"Copy-Item -Path "C:\path\to\source" -Destination "C:\path\to\destination" -Recurse
PowerShell offers the New-Item cmdlet to create new files and folders. By specifying the path and type of item you want to create, such as a file or directory, you can automate the creation of files and folders within your PowerShell scripts. E.g.,New-Item -ItemType File -Path "C:\path\to\example.txt"New-Item -ItemType Directory -Path "C:\path\to\new\folder"
PowerShell provides the Remove-Item cmdlet to delete files and folders from a specified location. You can use this command to remove individual files or entire folders, including their contents, enabling you to clean up and remove unnecessary files and folders within your PowerShell scripts.
We can export file names by piping the output of Get-ChildItem into Out-File. For instance: Get-ChildItem -Path C:\YourDirectory -File | Select-Object -ExpandProperty Name | Out-File -FilePath C:\list.txt.
To retrieve just the filenames, we can use the following command: Get-ChildItem -Path C:\YourDirectory -File | Select-Object -ExpandProperty Name
which will list only the names of the files in the directory.
Use the -Recurse parameter with Get-ChildItem like:Get-ChildItem -File -Recurse
This will get all files recursively through all nested folders down the directory tree structure.
File extensions may not always show by default. Use: Get-ChildItem -File | Format-Table Name,Extension
This ensures the output of both name and extension values.
Use Where-Object to filter by file size in bytes. For 2 MB+ files: Get-ChildItem -File | Where {$_.Length -gt 2mb}