How to Import CSV Files in PowerShell using Import-CSV cmdlet?
Are you looking for a quick and easy way to import CSV files into PowerShell? Importing data from CSV files is one of the most useful tasks in working with large datasets. With PowerShell’s numerous cmdlets, it’s easy to quickly parse through your CSVs and use them as input for automated scripts or other processes. Understanding the Import-CSV cmdlet and parsing CSV files are essential skills for any PowerShell professional. In this article, I will guide you through the process of importing CSV files using PowerShell. We will explore various methods to import CSV files with PowerShell, using ForEach loops, and how to handle common issues that may arise.
Table of contents
- Introduction to Importing CSV Files Using PowerShell
- Understanding the PowerShell Import-CSV Cmdlet
- Parsing CSV File Data in PowerShell Script
- Importing CSV Files Using PowerShell with a ForEach Loop
- Validating CSV File Data in PowerShell
- Importing CSV Files with Headers Using PowerShell
- Importing CSV Files Without Headers Using PowerShell
- Importing CSV Files into an Array in PowerShell
- Best practices for importing and working with CSV files in PowerShell
- Troubleshooting Common Issues When Importing CSV Files Using PowerShell
- Conclusion and Final Thoughts
Introduction to Importing CSV Files Using PowerShell
PowerShell is a command-line shell and scripting language that is widely used in the IT industry. PowerShell offers a powerful set of tools for managing and automating Windows-based systems. One of the most useful features of PowerShell is its ability to import and export CSV files.
CSV (Comma-Separated Values) files are a common file format for storing and exchanging data. CSV files store data in a tabular format, with each row representing a record and each column representing a field. Importing CSV files using PowerShell allows you to help automate administrative tasks by importing configuration data, user lists, or other relevant information from CSV files.
Understanding the PowerShell Import-CSV Cmdlet
PowerShell provides a built-in cmdlet called Import-Csv, which allows you to import CSV files into your PowerShell environment. This cmdlet reads the contents of a CSV file and converts it into a collection of objects, making it easier to work with and manipulate the data. The Import-Csv cmdlet automatically detects the headers in the CSV file and uses them to name the properties of the objects it creates. This makes it convenient to access and manipulate the data using familiar property syntax.
The Import-CSV Syntax
The basic syntax of the Import-Csv cmdlet is:
Import-Csv
[-Path] <string[]>
[-Delimiter <char>]
[-Header <string[]>]
[-Encoding <string>]
[-UseCulture]
[-LiteralPath <string[]>]
[<CommonParameters>]
To simplify, we use the Import-CSV cmdlet followed by the path to the file to get the data from the CSV file in PowerShell:
Import-CSV -Path "<Path of the CSV File>"
This cmdlet has the following useful parameters:
| Parameter | Description |
|---|---|
| -Path | Required Parameter, Location of the CSV file to import |
| -Delimiter | The delimiter that separates the property values in the CSV file. The default value is a comma (,). Use the -UseCulture parameter to use the list separator defined for the current culture of your computer. You can also use the “(Get-Culture).TextInfo.ListSeparator”. |
| -Encoding | Specifies the type of character encoding that was used in the CSV file, such as: Unicode | UTF7 | UTF8 | ASCII | UTF32 |BigEndianUnicode | OEM |
| -Header | Allows you to define custom headers for the columns. The Header string parameter is helpful when the CSV doesn’t have headers. Enclose each column header in single quotes or double quotation. |
Example: Reading CSV Files Using PowerShell
Reading CSV files using PowerShell allows you to view the contents of a CSV file quickly. You can use the Import-CSV cmdlet to read the contents of a CSV file and display them in the PowerShell console. To use the Import-CSV command, you need to provide the path to the CSV file. The path can be a local file path or a network path.
I have the following data on the “users.csv” file:
| Name | Designation | |
|---|---|---|
| Adele Vance | AdeleV@Crescent.com | IT Consultant |
| Alex Wilber | AlexW@Crescent.com | IT Support Specialist |
| Griselda Siciliani | DiegoS@Crescent.com | Web Developer |
| Grady Archie | GradyA@Crescent.com | IT Coordinator |
| Isaiah Langer | IsaiahL@Crescent.com | Software Developer |
| Johanna Lorenz | JohannaL@Crescent.com | IT Director |
| Joni Sherman | JoniS@Crescent.com | Software Developer |
| Lee Gu | LeeG@Crescent.com | SEO Specialist |
| Lidia Holloway | LidiaH@Crescent.com | Data Scientist |
Importing CSV files using PowerShell is a straightforward process. You can use the Import-CSV cmdlet to import CSV files and create custom objects based on the CSV headers. Here’s an example of how to read a CSV file using PowerShell:
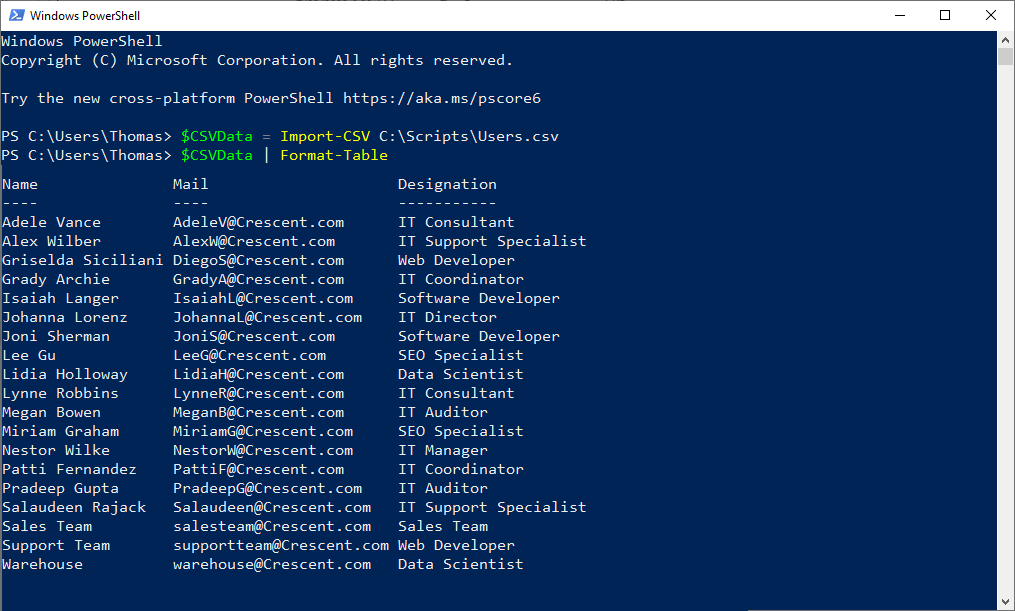
#Import the CSV
$CSVData = Import-CSV -Path "C:\Scripts\Users.csv"

#Get the data in Table-like format
$CSVData | Format-Table

#Display the data in Grid View from Pipeline input
$CSVData | Out-Gridview
This code reads the contents of the CSV file located at “C:\Scripts\Users.csv” and displays them in the PowerShell console.
Once you have imported the CSV file, you can store the imported data in a variable for further manipulation. For example, You can then access the data in the CSV file by referring to the properties of the objects in the $csvData variable. E.g., to retrieve the email addresses of all users:
$CSVData | Select-Object -ExpandProperty Mail
To get all columns of the CSV through the property of the custom object, use the Get-Member cmdlet. In this case: “$CSVData | Get-Member” returns: Name, Mail, and Designation as column names with TypeName: System.Management.Automation.PSCustomObject. Import-CSV returns an array of PSCustomObject representing each row of the CSV. Each column header in the CSV will be a property of the object.
$CSVData | Get-Member -MemberType NoteProperty | Select -ExpandProperty Name
You can also use the ConvertFrom-CSV and ConvertTo-CSV cmdlets to convert CSV strings to objects and vice versa.
Specifying Delimiters
By default, the Import-CSV cmdlet assumes that commas separate the columns in the CSV file. However, you can specify a different delimiter in PowerShell, such as a colon (:) or semicolon (;), using the -Delimiter parameter. For example, if your CSV file uses semicolons as item delimiter, you can import it like this:
Import-CSV -Path <Path to CSV file> -Delimiter ";"
Parsing CSV File Data in PowerShell Script
The Import-CSV cmdlet reads a CSV file and converts it into a table of objects, which can be easily manipulated within PowerShell. After importing the CSV data, you can access individual rows and columns just like you would with any other array of objects and perform operations such as Filtering, Sorting, selecting specific fields from the objects, etc.
Select Specific columns from the CSV File
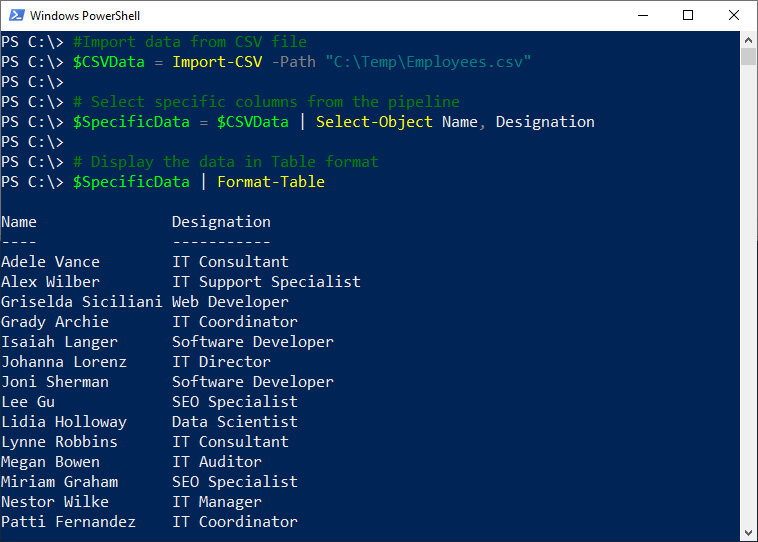
Parsing CSV files using PowerShell allows you to extract specific data from a CSV file. You can use the Select-Object cmdlet to select specific columns from a CSV file. Here’s an example of how to parse a CSV file using PowerShell:
#Import data from CSV file
$CSVData = Import-CSV -Path "C:\Temp\Employees.csv"

# Select specific columns from the pipeline
$SpecificData = $CSVData | Select-Object Name, Designation

# Display the data in Table format
$SpecificData | Format-Table
This code imports the CSV file located at “C:\Temp\Employees.csv” and selects specific columns using the Select-Object cmdlet. You can also filter rows based on specific criteria using the Where-Object cmdlet.
Filtering Data
PowerShell treats the imported CSV data as a collection of objects, allowing you to use familiar object-oriented techniques to interact with the data. We can use the Where-Object cmdlet to filter the imported CSV data based on specific criteria. For example, to retrieve all with the designation “Web Developer”:
$CSVData | Where-Object { $_.Designation -eq "Web Developer" }
Let’s take another example: Say your imported file has an “Age” column, and you want to get rows where the age is greater than or equal to 18.
$CsvData = Import-Csv .\data.csv
$Results = $CsvData | Where-Object { $_.Age -ge 18 }
$Results
This code filters the imported CSV data to only include records where the “Age” property is greater than or equal to 18 and then displays the resulting records.
Sorting Data
Sorting data is another common operation when working with CSV files. Like other PowerShell cmdlets, we can use the Sort-Object cmdlet to sort the imported CSV data based on one or more properties. For example, to sort the data by name in ascending order:
$CSVData | Sort-Object Name
Adding Calculated Properties
Sometimes, you may need to add calculated properties to your CSV data. PowerShell allows us to do this easily using the Select-Object cmdlet. For example, to add a calculated property called “FullName” that combines the first and last names:
$CSVData | Select-Object Name, @{Name="DisplayName"; Expression={ $_.FirstName + " " + $_.LastName }}
Exporting Data
After manipulating and managing the CSV data, you may want to export it back to a CSV file or another format. PowerShell provides the Export-CSV cmdlet for this purpose. For example, to export the modified data to a new CSV file:
$modifiedData | Export-CSV -Path <Path to new CSV file>
In PowerShell version 6 and later, the NoTypeInformation parameter is optional, which is used to eliminate the type information header from CSV output.
Importing CSV Files Using PowerShell with a ForEach Loop
The foreach loop is a powerful construct in PowerShell that allows you to iterate over a collection of objects and perform actions on each item. Combining the Import-Csv cmdlet with a foreach loop can be useful when you need to perform operations on each record in a CSV file. This is useful for performing batch operations on large sets of data.
Here’s an example of how to use a foreach cmdlet to import a CSV file using PowerShell: This will create a variable named $CSVData that contains an array of custom objects, one for each row of data. Each object has three properties: Name, Mail, and Designation. We can access these properties using the dot (.) notation. For example, to display the Name and Designation of the first item, we can use: $CSVData[0].Name, $CSVData[0].Designation
$CSVData = Import-CSV C:\Data\Users.csv

ForEach ($Row in $CSVData) {
    Write-Host $Row.Name
}
This code imports the CSV file located at C:\Data\Users.csv and iterates through each row using a foreach loop. You can perform any action on each row inside the loop, such as filtering, sorting, or exporting data.
You can also use the “ForEach-Object” loop to iterate through each row of the CSV file and perform some action. Here is an example:
# Import the CSV file
$CSVData = Import-Csv -Path "C:\Data\Users.csv"

# Process each row
$CSVData | ForEach-Object {
    # Display the value of the "Name" column for the current row
    Write-Output $_.Name
}
In this script, Import-Csv is used to import the data from the CSV file into a table of objects, which is stored in the $CSVData variable. The ForEach-Object cmdlet (aliased as %) then iterates over each object in the table.
Inside the ForEach-Object script block, $_ refers to the current object. So Write-Output $_.Name displays the value of the Name property of the current object, which corresponds to the Name column in the CSV file.
Validating CSV File Data in PowerShell
When importing data from CSV files in PowerShell, you can check if specific cells have values. You can access the values in the CSV by treating the imported data as an array of objects. Here’s an example of how to do this:
Suppose you have a CSV file named “data.csv” with the following content:
Name,Email,Phone
John Doe,johndoe@example.com,
Alice Smith,,123-456-7890
Bob Johnson,bobj@example.com,987-654-3210
You can use Import-Csv to read this CSV file and check if specific cells have values:
# Import the CSV file
$data = Import-Csv -Path "data.csv"

# Loop through each row in the CSV
foreach ($row in $data) {
    # Check if the 'Name' column has a value
    if ($row.Name) {
        Write-Host "Name: $($row.Name)"
    } else {
        Write-Host "Name is empty or null."
    }

    # Check if the 'Email' column has a value
    if ($row.Email) {
        Write-Host "Email: $($row.Email)"
    } else {
        Write-Host "Email is empty or null."
    }

    # Check if the 'Phone' column has a value
    if ($row.Phone) {
        Write-Host "Phone: $($row.Phone)"
    } else {
        Write-Host "Phone is empty or null."
    }

    Write-Host ""  # Add a blank line between rows for clarity
}
For each row, we check if specific columns (in this case, ‘Name’, ‘Email’, and ‘Phone’) have values using conditional statements.
Importing CSV Files with Headers Using PowerShell
When importing a CSV file that contains headers, PowerShell automatically uses the headers to name the properties of the objects created from the CSV data. This allows you to access the data using familiar property syntax. For example, if your CSV file has a “Name” column, you can access the values in that column by referencing the “Name” property of the imported objects.
Importing CSV files with headers using PowerShell is the default behavior of the Import-CSV cmdlet. The cmdlet creates custom objects based on the headers of the CSV file.
Here’s an example of how to import a CSV file with headers using PowerShell:
$Data = Import-CSV C:\Data\Employee.csv
This code imports the CSV file located at “C:\Data\Employee.csv” and creates custom objects based on the headers of the file.
Importing CSV Files Without Headers Using PowerShell
When importing a CSV file, the first row is usually treated as the header row, providing the names for the object properties. In some cases, you may have a CSV file that does not contain column headers. When importing such a file, PowerShell creates objects with default property names like “Column1”, “Column2”, and so on. To import a CSV file without headers, you can use the -Header parameter of the Import-Csv cmdlet to specify the column header row. For example, if your file is named “Employee.csv” and you want to add alternate column header row: “UserPrincipalName”, “GivenName” and “Email” as the column names:
$data = Import-CSV C:\Scripts\Employee.csv -Header "UserPrincipalName","GivenName","Email"
This code imports the CSV file located at C:\Data\Employee.csv and creates custom headers for each column. When utilizing the Header parameter, remove the actual header row from the CSV file to avoid Import-Csv generating an extra object based on the header row’s items.
Please note, When you specify fewer column headers than the number of data columns, the excess data columns will be ignored. Conversely, if you provide more column headers than there are data columns, the surplus headers will be accompanied by columns without data.
Importing CSV Files into an Array in PowerShell
In addition to importing CSV files into PowerShell as objects, you can also import them into arrays. Importing CSV files into arrays can be useful when you need to perform operations that require sequential or indexed access to the data. Here’s how you can achieve it:
- Import the CSV file using the
import-csvcmdlet and assign it to a variable. For example:$csvData = import-csv C:\Path\to\file.csv - The imported CSV data is now stored in the
$csvDatavariable, which you can access and manipulate as needed using array indexing and other array-related operations.
Importing CSV files into arrays allows you to perform advanced data manipulation operations, such as sorting, filtering, and aggregating data. Here is an example:
# Import the CSV file
$Array = Import-Csv -Path "C:\Scripts\Users.csv"

# Now, $array is an array of objects. Each object corresponds to a line in the CSV file. E.g., to Get the first row:
$row = $array[0]

# Get the value of the 'Name' column in the first row
$name = $row.Name
In this example, Import-Csv reads the CSV file at the specified path and converts it into an array of objects, which is stored in the $array variable. Then $array[0] is used to access the first row in the array (PowerShell arrays are 0-indexed), and $row.Name is used to access the Name column of that row.
Best practices for importing and working with CSV files in PowerShell
When working with CSV files in PowerShell, consider the following tips and best practices to ensure an efficient and error-free process:
- Validate the CSV file: Before importing the CSV file, check its structure and contents to ensure that it meets your expectations. Verify that the headers and data are correctly formatted and that there are no missing or inconsistent values.
- Handle data type conversions: CSV files store all data as text, even if the original values were of a different data type. When working with imported CSV data, make sure to handle any necessary data type conversions using PowerShell’s casting or conversion operators.
- Use error handling: When importing CSV files, there may be cases where the data does not conform to the expected format or contains errors. Implement error-handling mechanisms to gracefully handle such situations and provide meaningful feedback to the user.
- Consider memory usage: Importing large CSV files into PowerShell can consume a significant amount of memory. If you are working with large datasets, consider using techniques like streaming or incremental processing to minimize memory usage and improve performance.
- Always specify the delimiter if it’s different from the default comma (
,) to ensure proper data import. - Take advantage of filtering, sorting, and calculated properties to manipulate and manage the data effectively.
Troubleshooting Common Issues When Importing CSV Files Using PowerShell
Importing CSV files using PowerShell can sometimes lead to issues. Here are some common issues and how to troubleshoot them:
- CSV file contains special characters: If the CSV file contains special characters, such as accents or non-English characters, you may need to specify the encoding when importing the file. Use the -Encoding parameter with the Import-CSV cmdlet to specify the encoding.
- CSV file is not found: If the CSV file is not found, make sure that the path is correct and that you have permission to access the file.
- CSV file contains empty columns or rows: If the CSV file contains empty columns or rows, use the Delimiter parameter to specify the delimiter used in the file. If the delimiter is not a comma, use the -Delimiter parameter to specify the delimiter.
So, mostly it could be due to an invalid file path, incorrect delimiter character, or mismatched data types for columns.
Conclusion and Final Thoughts
In this comprehensive guide, we explored the process of importing CSV files in PowerShell. We started by understanding the basics of data management and the role of CSV files in this process. We then delved into the import-csv cmdlet, providing an overview of its functionality and capabilities. Following that, we provided a step-by-step guide on how to import CSV files into PowerShell, covering scenarios with and without headers. Furthermore, we discussed examples and use cases of importing CSV files, highlighting the benefits of PowerShell’s data manipulation capabilities. Finally, we shared tips and best practices to optimize your experience with importing and working with CSV files in PowerShell.
By following the guidelines in this article, you can import CSV files using PowerShell with ease and efficiency. Remember to troubleshoot common issues, such as special characters and empty columns, to ensure a smooth import process. With these skills, you can take your data management to the next level and become a master of PowerShell.
Import-CSV is a PowerShell cmdlet used to read data from a comma-separated values (CSV) file and convert it into PowerShell objects. You can then manipulate and analyze the data using other PowerShell cmdlets.
The basic syntax is Import-Csv -Path "C:\path\to\your\file.csv". Replace the path with the actual location of your CSV file. You can also use wildcards or specify additional parameters like Delimiter for different separators.
If you don’t have the “ImportExcel” module installed already, install it with: Install-Module -Name “ImportExcel”. Once installed, you can import the CSV data and save it as an Excel file using the Export-Excel cmdlet. E.g.,#Import the CSV file
$CSVData = Import-Csv -Path "C:\Scripts\Employees.csv"
#Export the data to an Excel file
$CSVData | Export-Excel -Path "C:\Scripts\Employees.xlsx"
To display output in table format in PowerShell, you can use the Format-Table cmdlet. This cmdlet allows you to format and organize your output into columns and rows, making it easier to read and analyze. Simply pipe your output to Format-Table and specify the properties you want to display as columns. For example, you can use the following command: Get-Process | Format-Table Name, Id, CPU
This will get all process objects, Pipe to Format-table with columns: Process name, ID, and CPU usage to output in a table format.
To import multiple CSV files from a folder in PowerShell, you can use the Get-ChildItem and Import-Csv cmdlets in a loop. Here is an example of how to do it:#Get a list of the CSV files in a directory$CSVFiles = Get-ChildItem -Path "C:\Scripts\Users" -Filter "*.csv"
#Initialize an array to hold the data from the CSV files
$csvData = @()
#Loop over each CSV file
foreach ($csvFile in $csvFiles) {
# Import the CSV file
$csvContent = Import-Csv -Path $csvFile.FullName
# Append data from the CSV file to the array
$csvData += $csvContent
}
#Now, $csvData contains the combined data from all the CSV files
$csvData
To read a CSV file line by line in PowerShell, you can use the “Import-Csv” cmdlet along with a “foreach” loop. Here’s an example of how you can do it:
#Get the content of the CSV file
$csvContent = Get-Content -Path "C:\Scripts\Users.csv"
#Loop over each line
foreach ($line in $csvContent) {
# Display the line
Write-Output $line
}
Although the get-content cmdlet in PowerShell can read text files, the import-csv cmdlet in PowerShell gives the flexibility to access the CSV file contents in Table-Row format.
Assuming you have the “ImportExcel” module installed on your PC, Here is how to read data from an Excel file:$data = Import-Excel -Path "C:\Scripts\Users.xlsx"
# Display the data
$data
To import Active Directory users from a CSV file using PowerShell, you can use the Import-Csv cmdlet to read the CSV file and then loop through each row and create user accounts in Active Directory using New-ADUser cmdlet.#Import the CSV file
$users = Import-Csv -Path C:\Path\To\Users.csv
#Loop over each row
foreach ($user in $users) {
# Create a new AD user
New-ADUser -Name $user.Name
-AccountPassword $user.Password `
-Enabled $true
}
In PowerShell, you might need to convert each item in the array into an object, and then you can export an array to a CSV file using the Export-Csv cmdlet. Here’s a simple example:#Create an array
$Array = @("John","Jane","Jacob","Jonathon","Julia")
#Convert array to custom objects
$ObjArray = $Array | ForEach-Object { [PSCustomObject]@{Value = $_}}
#Export the array to a CSV file
$ObjArray | Export-Csv -Path "C:\Scripts\Output.csv" -NoTypeInformation
More here: How to Export to CSV from PowerShell?
By default, Import-CSV uses the first row as headers. If there are no headers, you can use the Header parameter to specify an alternative row for headers.
Yes, use the Select-Object cmdlet after Import-CSV and specify the desired columns by name. For example, $data | Import-Csv -Path "C:\Temp\data.csv" | Select-Object Name, City.